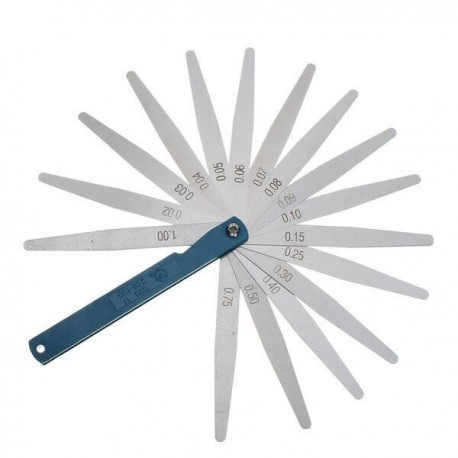
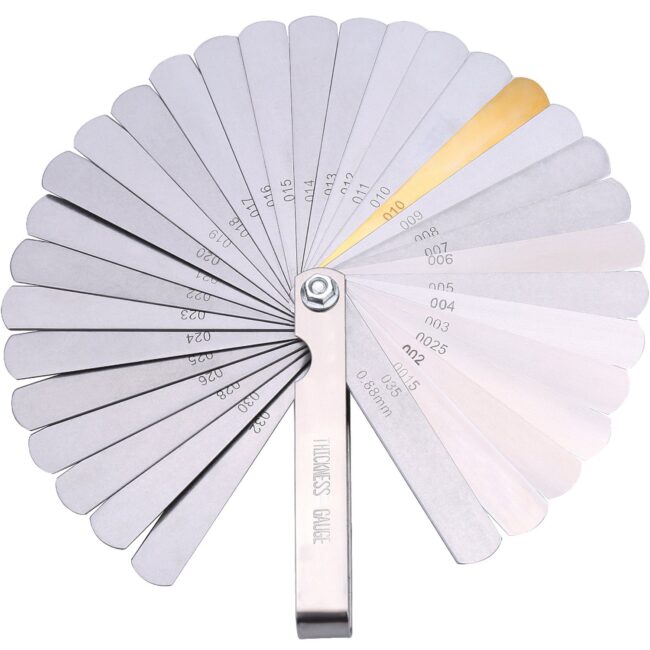
What size feeler gauge for 3D printer is one of the commonly asked questions by persons who deal with 3D printers regularly.
But to answer that, it’s important that we begin by knowing and identifying exactly what is referred to as “feeler gauge” for future reasons.
The feeler gauge is a fundamental but basic tool that belongs to the repair and maintenance kit of a 3D printer.
A feeler gauge aid in machine maintenance as a need to accurately adjust distances between elements.
These separations are essential to compensate thermal expansion, apportion a margin of separation between elements that fit together as well as precisely adjust the distance between the two elements.
This is a crucial process, as it works to separate the nozzle from the base a very fair length, which will affect getting a good impression.
The distance is usually dependent on each 3D printer, each nozzle as well as the printing temperature, but a value that is generally efficient is 0.10 mm.
Feeler Gauge Fitting
For a start, the base needs leveling, and to do that – the extruder is brought to the “Home” of the Z axis and to the center of the base.
Once there, with the gauge of 0.10 mm thick, you may adjust the height between the nozzle and the base until the gauge of 0.10 mm enters and comes out justly.
When that is done, run the same operation for the four corners of the base. Once the first adjustment is finished, the whole process should be repeated to verify that the base is perfectly leveled, run a test print to see what your results are.
If the extruder is in very close proximity with the base, the first layer will be quite stepped and thin; and, if the extruder is too far away, the layer probably will not adhere to the base.
A thickness gauge may also be necessary in the assembly of extrusders and HotEnd, where manufacturers have indicated in their assembly manuals a series of gap for the correct operation of all the elements they consist of.
These feeler gauge for 3D printer is manufactured in wear-resistant stainless steel and calibrated with professional measuring instruments to ensure accurate measurement.
How to Level Feeler Gauge for 3D Printer
Leveling a feeler gauge for 3D printer is most usually seen as one of the most difficult thing you have to learn when you first have one, and before you get the process right, it will take a couple of days to get the process right, for most persons.
In this article, you will find two methods to determine feeler gauge for 3D printer as well as steps, pros and cons to guide your choice.
1. With a Piece of Paper
A piece of paper can be used to level a 3D printer, using a piece of paper enables you to feel how much friction there is between the nozzle and the bed and you can then determine if the distance is set right or not.
This is the most common method, particularly because it’s free and because it works well too. However, to accomplish it, takes time.
Also, since you will need to feel how much friction there is, between the nozzle and the bed when moving the paper.
It might be quite challenging and may not be as consistent since you have to rely on your touch to gauge the amount of friction, and you are most likely to encounter that the nozzle is either too close or too far from the bed.
The results of this when you are just getting started with 3D printing, is that you’ll have some failed prints.
Also, because the paper method struggles with consistency, you may have to go through the leveling process more than once to master and fine-tune it while the printer is printing the skirt/brim to get a great first layer.
In 3D printing, getting the first layer right is everything; when you get it right, your model won’t detach from the build plate, or warp, implying that it will come out beautiful.
On the other hand, failing at the first layer or encountering errors could result in poor bed adhesion, causing the print to suddenly detach mid print, forcing you to restart the process.
Pros
It’s free.
Once you know how to do it, it’s easy.
Cons
Not as consistent.
Takes a lot of time to get right.
2. Using a Feeler Gauge for 3D printer

Unload the filament by setting both extruders to the proper unloading temperature. Usually at 5-10℃ higher than its common printing temperature.
2) Select “Unload” to begin the unloading process, and after completion, remove the filament and the filament guide tube from the extruder.
3.) Open the ‘Home’ tab, and click on the nozzle temperature, set the temperatures for both nozzles to 0 in the new Window and click OK. Allow the components to cool down completely before continuing.
Remove the screws from the cooling fan, and raise the Z limit pin by rotating the bottom screw by a turn in the counter clockwise.
Calibrate the right nozzle and once the hotend has cooled down completely, proceed to insert the feeler gauge under the right nozzle and check the height.
Note, it’s very important to level the bed correctly, so ensure to do it as best as possible or get help from more experienced hands.

