
In Google sheets, you can create, edit, and share data on spreadsheets stored in the cloud. Aside creating and editing spreadsheets, Google Sheets also supports other features for data analysis, chart creation and automation using formulas and functions.
This is usually not an easy task as you will have to maneuver the rows and columns in Google Sheets to create a personalize calendar that suits your needs.
How to Make a Calendar in Google Sheets
To make a calendar in Google Sheets, you either create a calendar from scratch or you use the calendar templates available in Google Sheets.
Creating a calendar from scratch allows you input your special needs in a calendar to it. But creating a calendar using templates is quick and easy, and best used if you don’t have enough time to create a calendar from scratch.
Step #1. Getting your Google Sheet ready
- Create a new Spreadsheet by opening a new sheet.
- Set the title of the calendar. You can use the current month as the title. You can use the first row as the name of the month, or merge cells and text align to format it.
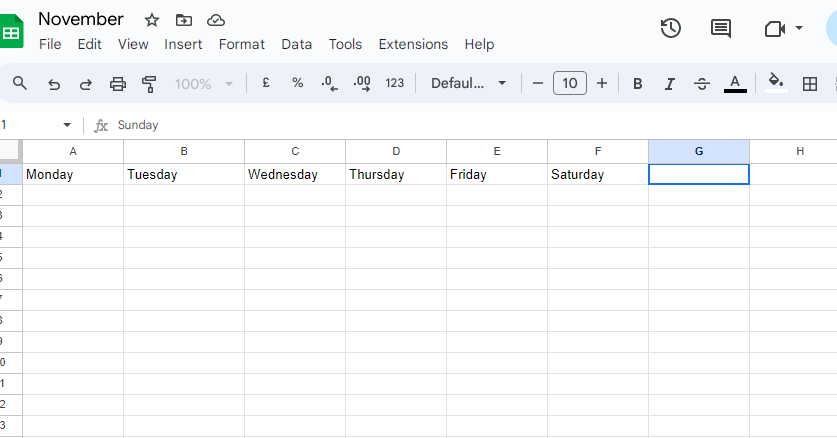
- Then assign the days of the week to each column. Write out the days of the week in the second row; from A1 – G1 (MONDAY, TUESDAY…). You can type them in manually.
Or type MONDAY in the first cell and apply the Auto Fill function by:
- Select the first cell.
- Click the circle on the bottom right of the cell.
- Hold and drag your mouse horizontally from A2-G2.
- The rest of the days will be automatically filled into the cells.
Step #2. Assign Dates to the Cells
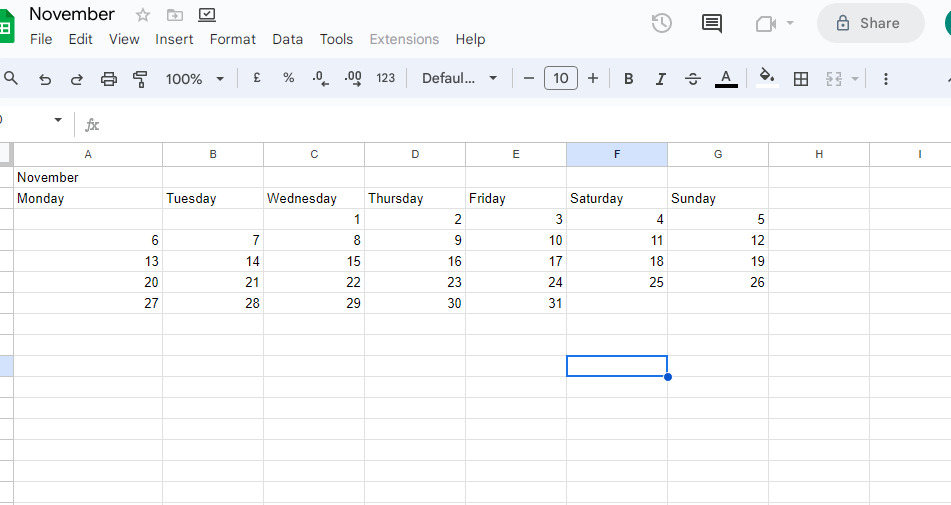
The next step is to assign dates to the cells. You can use a real calendar as a guide to fill the dates in your calendar accordingly. You can either type manually or use the Auto Fill.
To use Auto fill in this case:
- Fill at least two cells and select the two.
- Click on the blue circle.
- Then hold while you drag your mouse horizontally to the next 5 cells.
- This will assign the dates to the next 5 cells, do this in each row.
Step #3. Customize your Calendar
Now that you have added the weeks and date to the rows, you can go ahead and give your calendar a personalized touch. This includes changing the color of the texts, changing the fonts, changing the background etc.
Here are some tips to help you customize the calendar you have created:
- You can add a blank row for note taking under each line of dates.
- You can resize the cells to your liking.
- You can format important dates to stand out or act as a reminder.
- You can add your brand’s colors to the calendar.
- Use conditional formatting to change cell colors. You can turn a blank cell to any color of choice. Event days can have multiple colors.
- Merge and Center the Month: by selecting the cell containing the month, and drag through the cells to the end of the calendar on the right, and click the Merge button in the toolbar to pick “Merge Horizontally.” Then, use the Alignment button in the toolbar to pick the center option.
- Format the Month and Days Font: You can select the cell containing month or days and change the font size, color, and style with the buttons in the toolbar.
- You can also add events, birthdays, holidays and use a color to make them stand put.
- You can insert a link or an image into a cell.
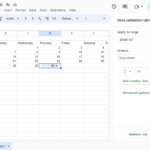
Step #4. Adding Events and Appointments
You can use the drop-down menu to include events and appointments to the calendar.
- Select a cell with the date you want to add an event or appointment to.
- Click on Data option in the menu bar.
- Select Data Validation.
- An editor will come up on the right.
- Enter the events in the option field.
- Change the color to your preferred color.
- Click Done.
When you click on that cell, the events will pop up on the drop-down menu. You can take it further and add a link to that event by selecting the Add a link option under the Insert menu.
#Step #5. Color Coding Events
You can color code events, birthdays, appointments, etc.
To color code events:
- Highlight the cell that represents the day of the event.
- Select the Format option in the menu bar.
- Select Conditional Formatting.
- Click on color scale.
- Add the color you prefer.
- Click DONE.
Creating a Calendar using Google Sheets Templates
Google Sheets has a calendar template you can use, if you do not want to create a calendar from scratch. Here’s how to access the Google Sheets calendar template.
- Open Google Sheets and create a new blank spreadsheet.
- Go to File.
- Select New.
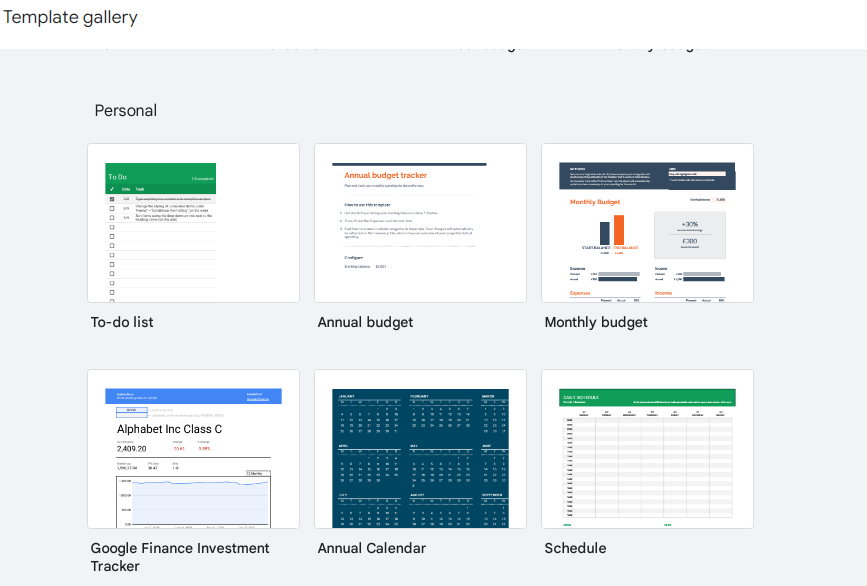
- From the Template Gallery pick a calendar.
Or;
- Open Google Sheets in your browser
- Go to File in the top left menu.
- Click on New, and then click on “From Template Gallery”.
- A new tab will open in your browser where you’ll see multiple templates to use in your spreadsheet.
- Click on Annual Calendar to create a Calendar in your sheet and use this template.
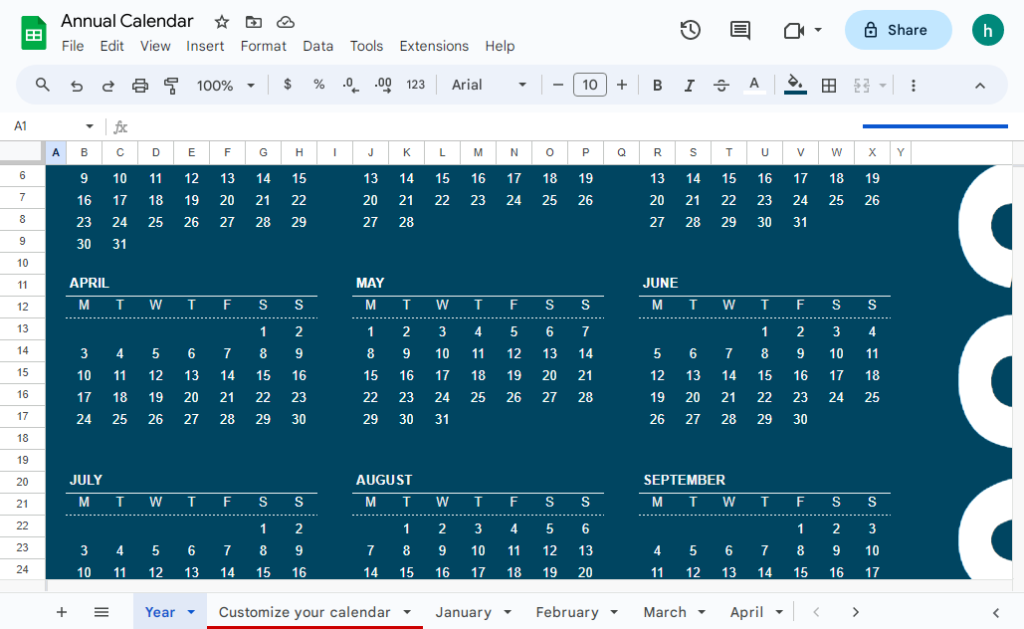
Customize your Calendar
After adding the template to your worksheet.
- Go to Format.
- Click on Theme and customize your calendar from here.

You can change the color of the calendar change the font style and many other things.
Sharing and Collaborating Your Calendar in Google Sheets
When you are done creating your calendar, either from scratch or using a template. You can now share the calendar with other users, or invite collaborators.
Click the share button in your Google Sheets, and add the email address of the people you will like to collaborate with you. Or copy link and share the link with other users. You can set permissions for what the collaborators can do on the sheet; they can edit or add comments.

Also, you can click in File and select Share, so that you can publish to the web.
Syncing with Google Calendar
To sync your calendar in Google Sheets with Google Calendar, you have to use an add-on that enables you do this seamlessly. Add-ons like Zapier, or Sheets2Cal, Coupier.io, etc.
Another method is to copy the link of your Google Calendar and add the link to your Google Sheets. Just highlight and select a cell > Click on the Insert option and select add a link > Then input the link. Clicking the link will lead you directly to Google calendar.
FAQs
How can I create a dynamic calendar in Google Sheets?
To create a dynamic calendar you have to create something from scratch.
Step #1: Open a blank spreadsheet in Google Sheets.
Step #2: Add the title of the month, e.g. November.
Step #3: Add the days of the week to the cells, from A1 to G1.
Step #4: Then using a physical calendar, add the dates to each day of the week.
Step #5: Then customize the calendar to suit your needs and make it dynamic.
How do I add a calendar drop down in Google Sheets?
To add a dropdown to your Google sheets calendar:
Step #1: Highlight a cell with the date you want to add a drop down to.
Step #2: Click the Data option in the menu bar.
Step #3: Select Data Validation.
Step #4: When the editor appears in your sheets, you can add a list of options.
Step #5: Also add a color to make it stand out.
Step #6: Then click Done.
Is there a free Google Sheets calendar template available?
Yes, Google sheets has a free calendar template you can use instead of creating something from scratch.
Step #1: Go to File > New > From Template Gallery
Step #2: Click on Annual Calendar
Step #3: Customize your Calendar
How can I create a fillable calendar in Google Docs?
To create a fillable calendar in Google docs:
Step #1: Open a new document in Google Docs.
Step #2: Add a table, they will make up your calendar squares.
Step #3: Input the dates and days of the week.


